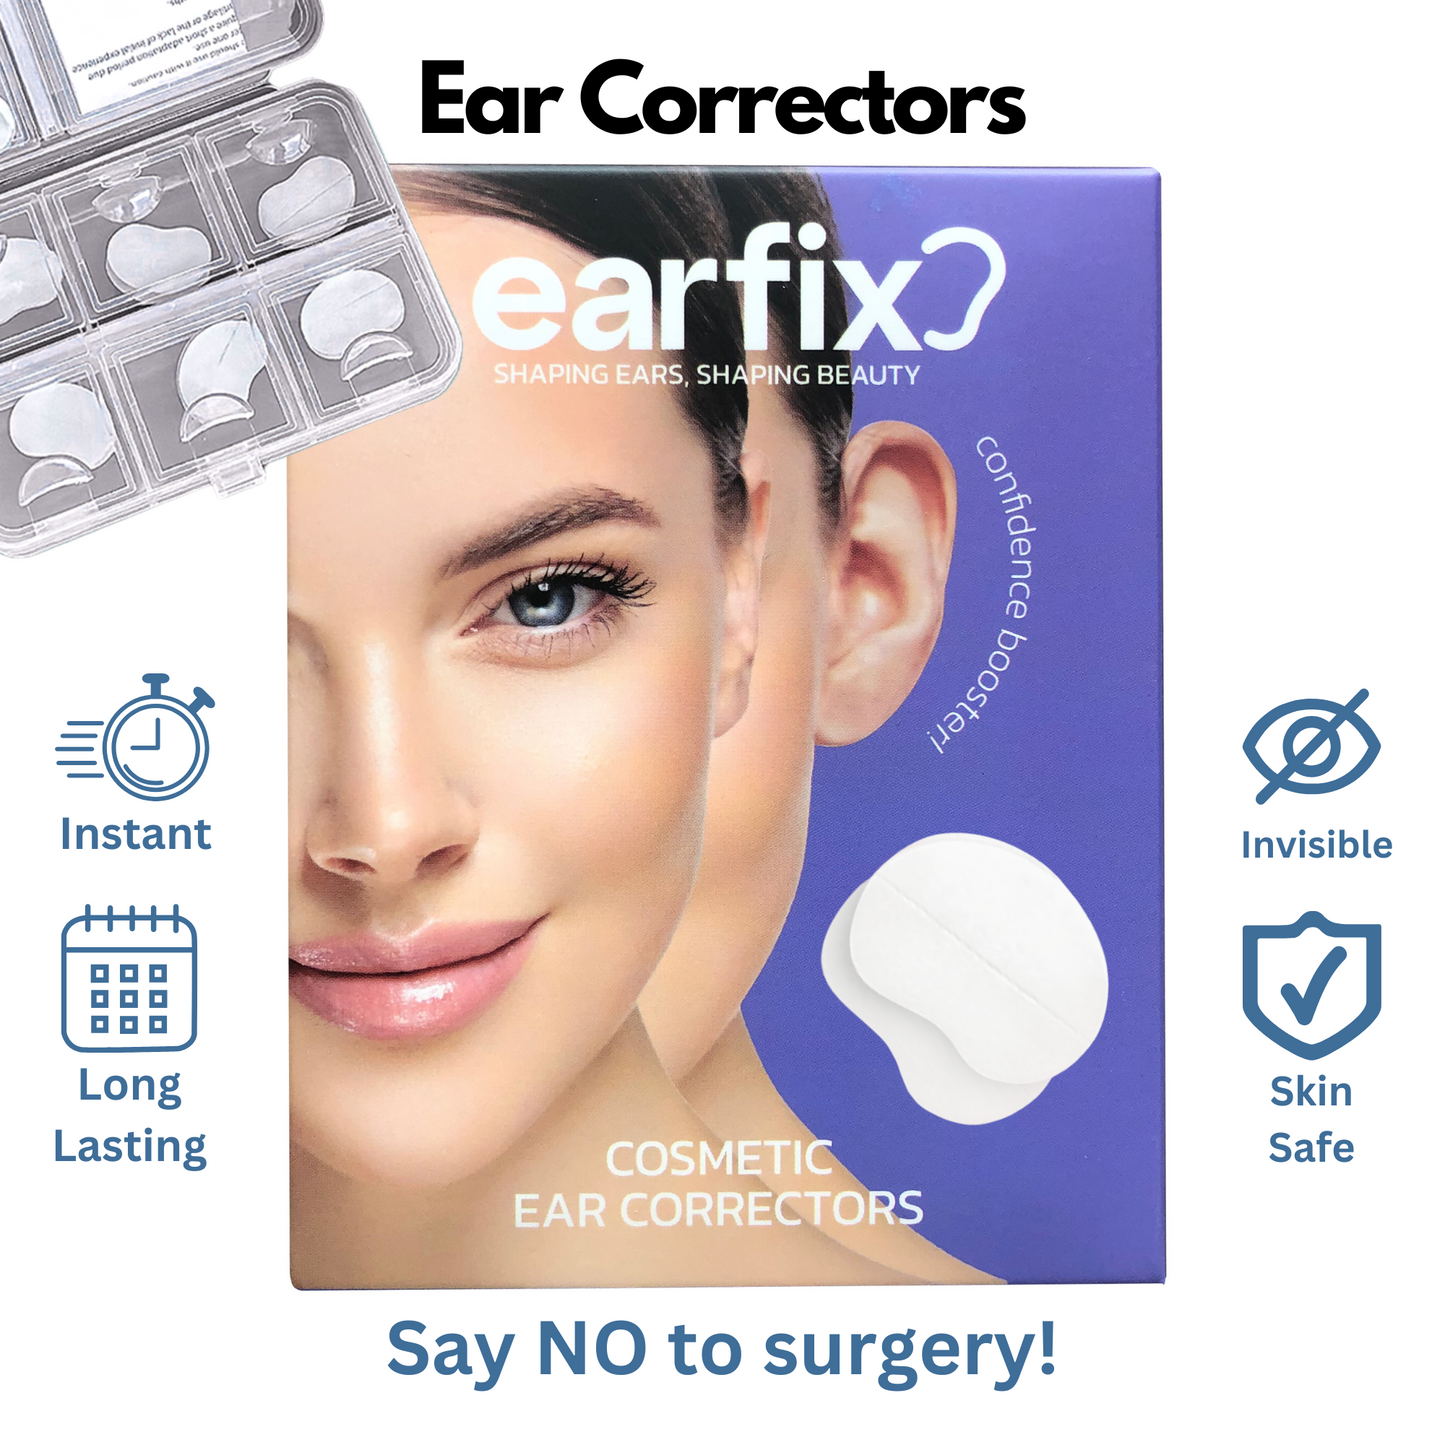

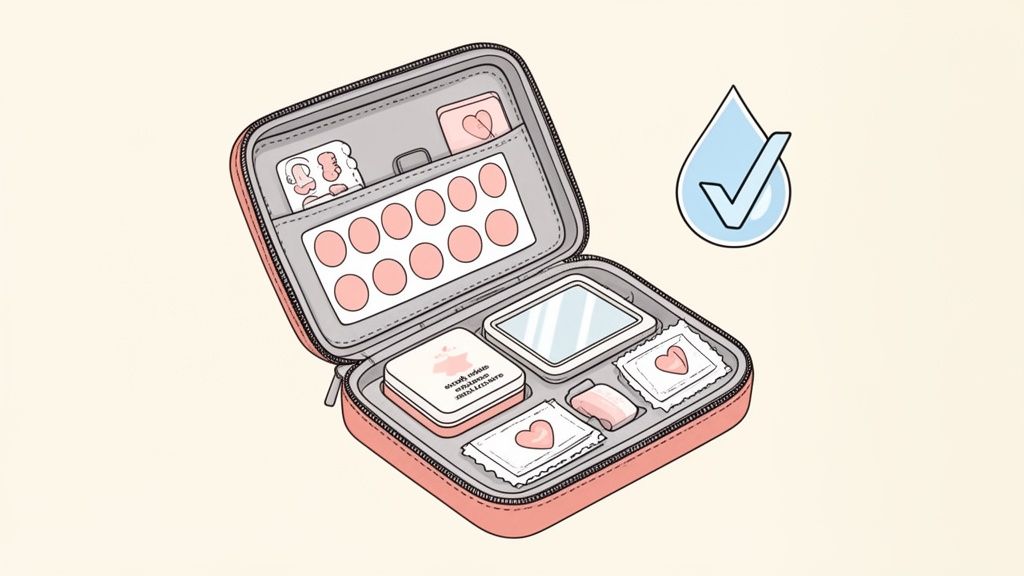
Ear stickers are a friendly and accessible game-changer for big events like weddings and photoshoots, offering an instant, pain-free way to achieve the look you want. These small, medical-grade silicone correctors are wonderfully discreet and give you the confidence to rock any hairstyle—especially those elegant updos—so you can look and feel incredible in every single picture. Think of them as your secret weapon for camera-ready confidence, without any of the fuss.
Achieving Flawless Photos On Your Special Day

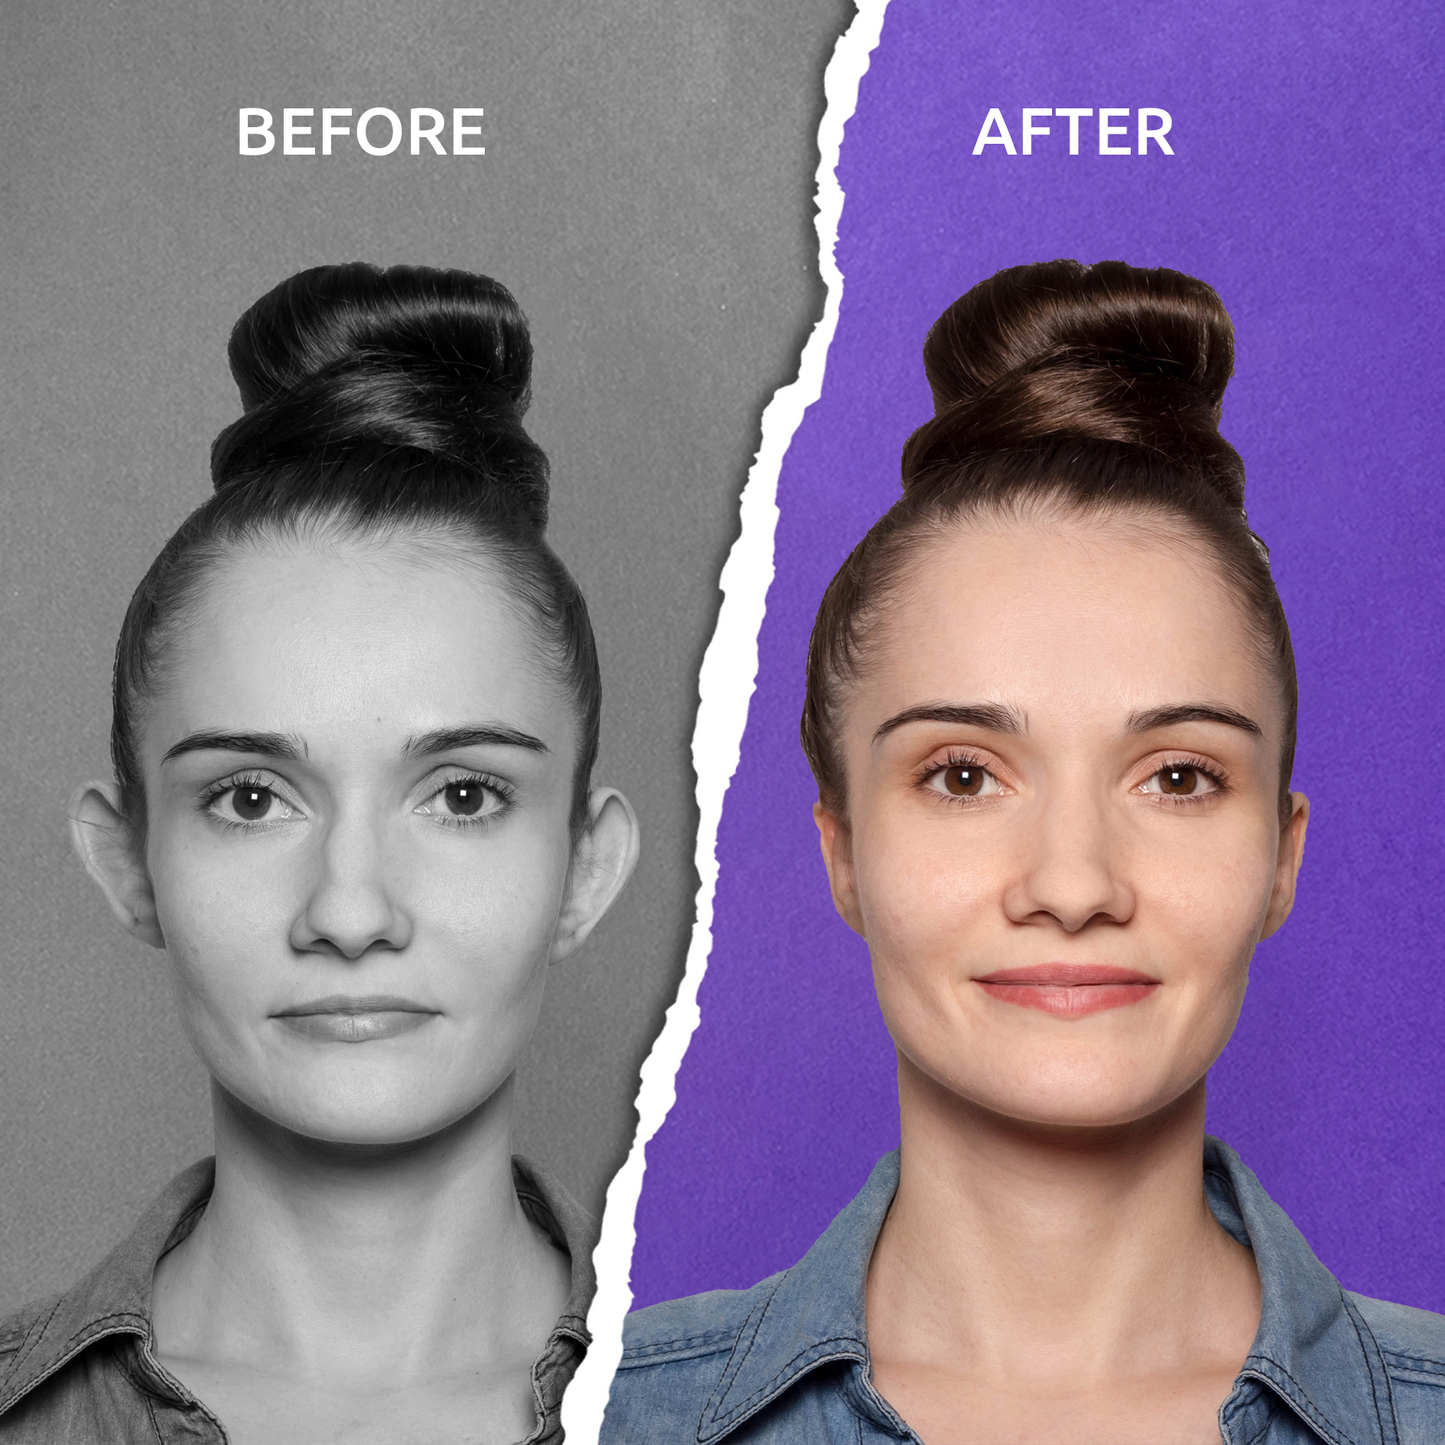
Weddings and professional photoshoots are milestone moments where every detail matters. You're capturing memories that will last a lifetime, and the last thing you want is to feel self-conscious about your ears. For many, prominent ears can feel like a roadblock to choosing a dream hairstyle or posing naturally for a profile shot. This is exactly where a simple, non-invasive prominent ears solution like EarFix makes all the difference.
A Modern Solution for Timeless Confidence
It’s no surprise that ear correction stickers have become a go-to for special events. In the fast-growing non-surgical cosmetics world, these adhesive correctors are a popular choice. One recent survey found that 67% of brides and 54% of grooms now consider small cosmetic tweaks before their big day, with many choosing discreet options like ear patches to nail their look without anything invasive.
This shows a big shift toward temporary, accessible solutions. Why commit to the expense, discomfort, and recovery of surgery when you can achieve a similar aesthetic in just a few minutes? It’s all about feeling empowered to look exactly how you’ve always imagined. For more great advice, you can check out our guide on how to look better on camera.
A quick comparison puts it into perspective:
Non-Surgical Otoplasty: Ear Stickers vs. Surgery
Here’s an honest look at how a simple solution like EarFix compares to a permanent surgical procedure when you have a big event on the horizon.
| Feature | EarFix Ear Stickers | Otoplasty Surgery |
|---|---|---|
| Time Commitment | A few minutes to apply | Weeks to months (consultation, surgery, recovery) |
| Cost | Affordable, single purchase | Significant investment (thousands of dollars) |
| Pain Level | Pain-free, completely non-invasive | Moderate to severe post-op pain and discomfort |
| Recovery | None. Apply and go! | 1-6 weeks of downtime, swelling, and bandages |
| Risk | Minimal (possible skin irritation) | Infection, scarring, anesthesia risks, asymmetry |
| Permanence | Temporary cosmetic improvement | Permanent results |
| Convenience | Extremely high. Use whenever needed. | Low. Requires significant planning. |
While otoplasty is a permanent solution, for a one-time event like a wedding, the convenience, affordability, and lack of downtime with EarFix is an incredible, stress-free alternative. You can learn more in our detailed EarFix vs Surgery guide.
More Than Just a Cosmetic Fix
The real magic of using ear stickers for your wedding or photoshoot goes beyond appearances; it's about the mental and emotional boost. When you feel completely confident, it shows in everything you do. You'll smile more freely, interact more naturally, and focus on the joy of the moment—not worry about how you might look from a certain angle.
EarFix gives you that final touch of confidence, letting you forget about any insecurities and just be completely present. It's a small adjustment that makes a massive emotional difference, ensuring your photos reflect nothing but pure happiness.
And for parents getting ready for a family photoshoot, the baby ear corrector version of EarFix is a wonderfully safe and gentle option. It’s made with dermatologist-tested, hypoallergenic materials specifically for an infant's delicate skin, ensuring your little one stays comfortable while looking picture-perfect. Whether for you or someone you love, EarFix is a simple, effective way to get those flawless photos. You can read more inspiring Customer Stories.
Choosing The Right Ear Corrector And Preparing Your Skin
The secret to a flawless, invisible hold that lasts through every photo and dance number? It starts before you even touch the adhesive. It all comes down to choosing the right product and prepping your skin the right way.
This simple prep work is the foundation for confidence, making sure your ear correction stickers feel comfortable and, most importantly, stay put all day long.
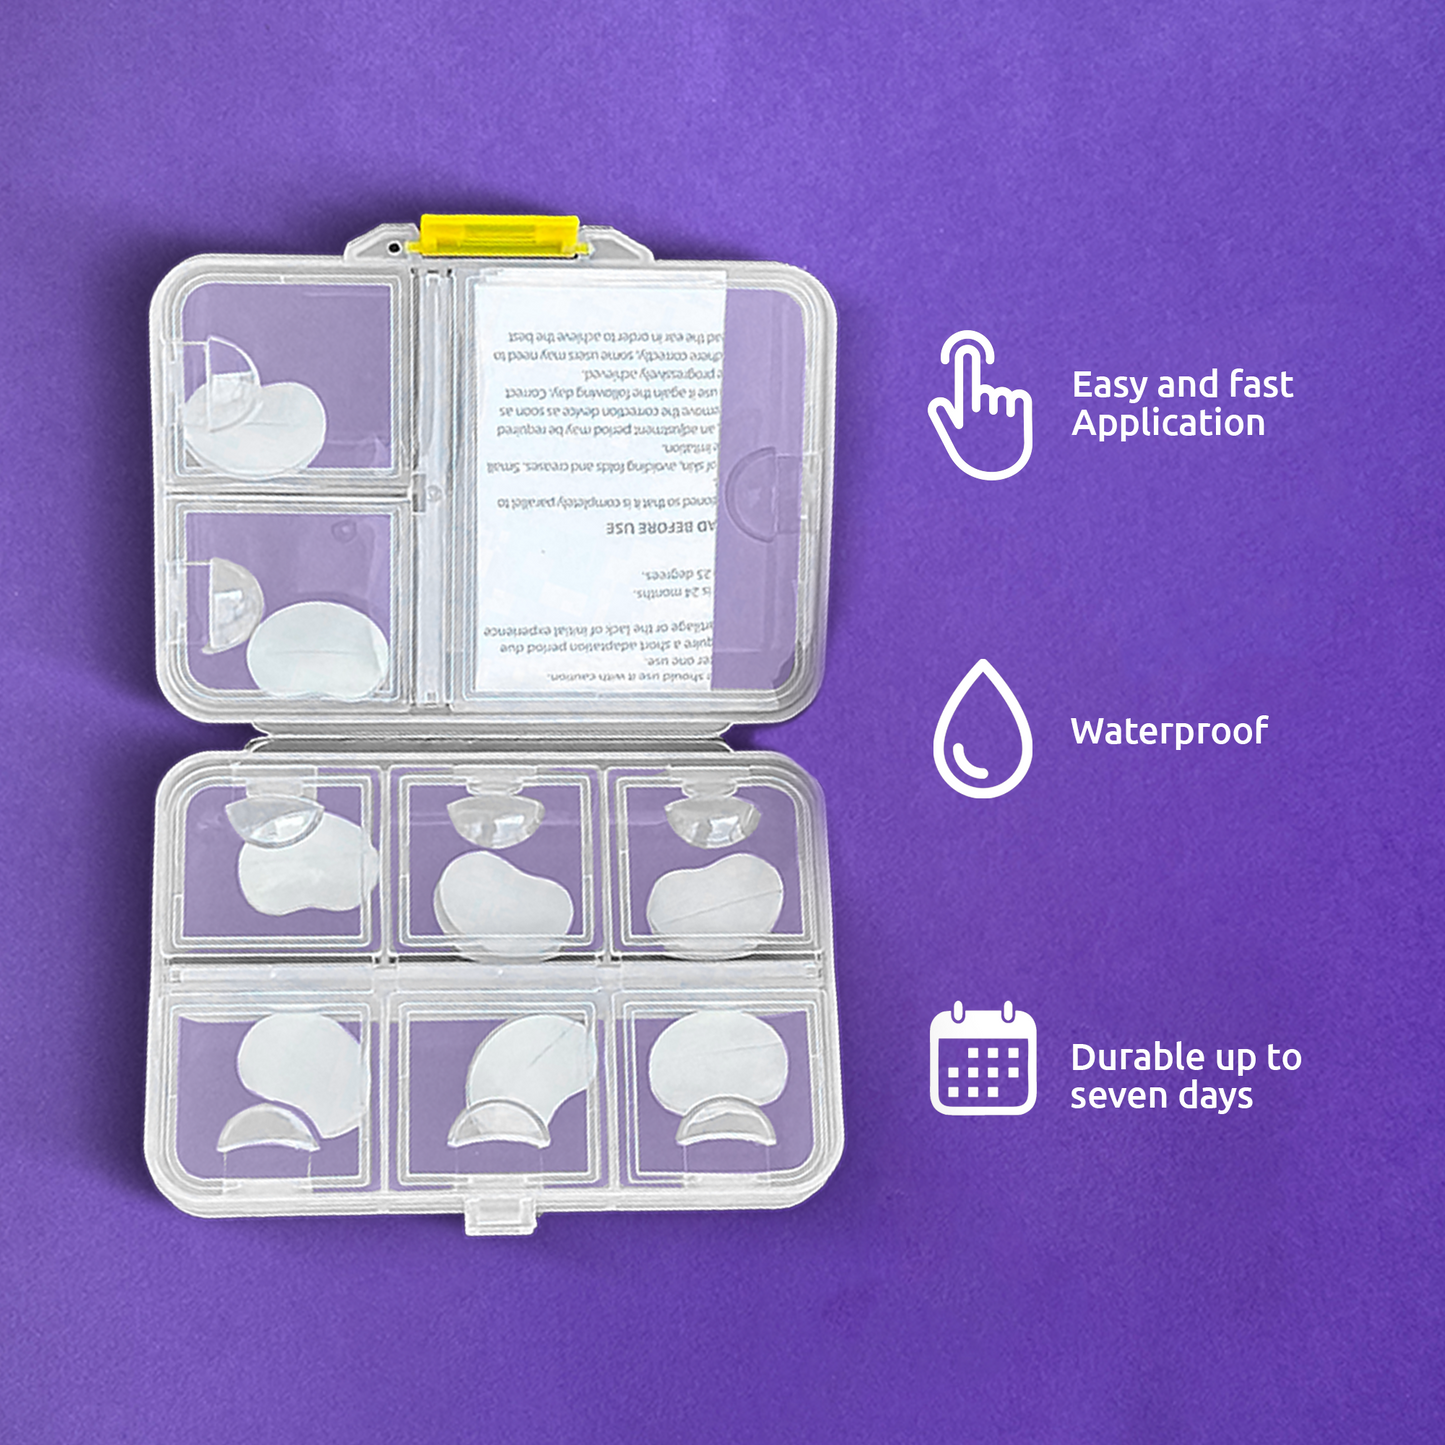
Choosing the right corrector is straightforward. For adults and teens getting ready for a wedding, photoshoot, or any other big event, the standard EarFix Adult corrector is your go-to. It's designed with a strong, medical-grade adhesive that can easily handle a long day of activity.
But if you're planning a family photoshoot with a little one, you'll need a much gentler approach. The baby ear corrector version of EarFix was created specifically for an infant's delicate skin. It uses a softer, hypoallergenic adhesive that’s still effective but puts safety and comfort first.
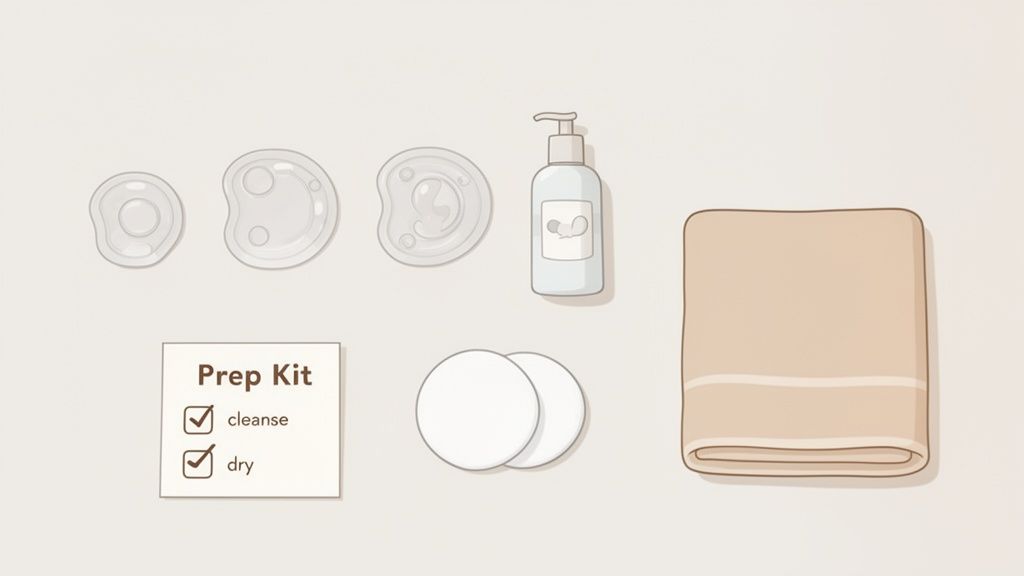
The Importance Of A Clean Canvas
Think of applying an ear sticker like painting on a fresh canvas. Any bit of oil, makeup residue, or moisture will stop the adhesive from bonding properly. This is the single most common reason people run into issues, but it's also the easiest one to prevent.
Before you apply anything, you need to create the perfect surface. This means giving the area behind your ear—and the spot on your head where the sticker will attach—a thorough cleaning.
- Cleanse Thoroughly: Use a gentle, alcohol-free cleanser or a cotton pad with rubbing alcohol to wipe away natural skin oils, lotions, or leftover makeup.
- Watch Out for Hair Products: Be mindful of hairspray, mousse, or serums. These products often have oils and silicones that can sneak onto your skin and interfere with adhesion. Our advice? Apply your EarFix correctors before you style your hair.
- Make Sure the Area is Bone-Dry: We can't stress this enough. After cleansing, use a clean towel or cotton pad to pat the area completely dry. Even the slightest hint of moisture can ruin the hold.
Remember, the goal is a clean, dry, and oil-free surface. Taking just two minutes to prep your skin can be the difference between a 12-hour secure hold and a corrector that starts to lift halfway through the event. You can find more detailed instructions in our How to Use EarFix guide.
Selecting Your Perfect Prominent Ears Solution
When you're looking for a prominent ears solution for a special day, comfort and safety are just as crucial as the cosmetic result. Unlike invasive surgery, ear stickers are a completely pain-free, non-invasive option. EarFix products are made from dermatologist-tested, hypoallergenic silicone, making them safe even for sensitive skin. You can read more on how this stacks up against other options in our EarFix vs Surgery comparison.
For parents, this peace of mind is even more vital. Knowing the baby version is latex-free and designed for the most sensitive skin lets you focus on capturing beautiful memories without any worry. For some inspiring examples, check out our Customer Stories.
Ready to find the perfect fit for your special day? Explore the EarFix Adult and Baby products at earfixusa.com or find us on Amazon to experience the confidence of a flawless look firsthand.
Mastering The Application For An Invisible Hold
Getting that flawless, picture-perfect look is all in the details. When it comes to ear stickers for weddings or photoshoots, a seamless application is what makes them truly magical. You want a secure, invisible hold that lasts from the first photo to the last dance, and that just takes a little bit of technique. Don't worry—it’s incredibly simple once you get the hang of it.
The real goal is to feel so comfortable and confident that you completely forget you're even wearing them. With a little practice, applying EarFix will become second nature, making sure you look and feel your absolute best when all eyes are on you.
Finding Your Perfect Placement
Every ear is unique, which means the "sweet spot" for placement will be different for everyone. This isn't about forcing your ear into an unnatural position; it's about finding the most comfortable fold that gives you the look you want.
Before you even peel off any adhesive backing, hold the corrector up to your ear. Gently press your ear back with your finger and see where it folds naturally. That's your target zone. The corrector should sit right in that natural crease between your ear and your head.
- Top Half Placement: For most people, placing the corrector on the upper half of the ear (the helix) delivers the most natural-looking result.
- Avoid Over-Correcting: Don't pull your ear back too far. You're aiming for a subtle, symmetrical look, not a flattened one.
- Mark the Spot (Mentally): Take a mental snapshot of where the two sides of the corrector will land—one on the back of your ear and the other on the skin right behind it.
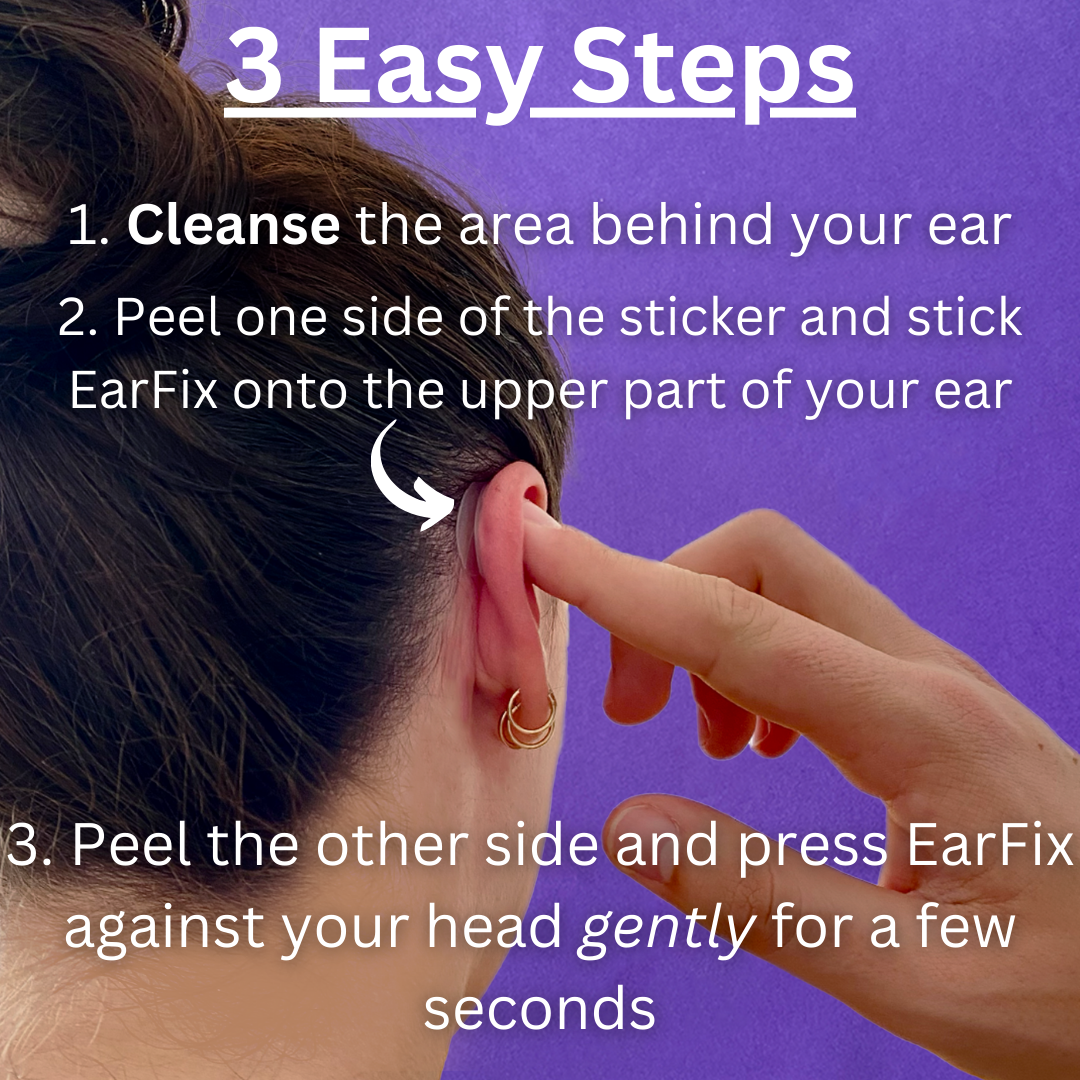
The Two-Step Application Process
Okay, you know where the corrector is going. Now it's time to apply it. The trick here is simple: handle the adhesive as little as possible. This keeps it at maximum stickiness.
First, peel the protective paper from just one side of the corrector. Stick this side to the back of your ear, right in the spot you picked out. Press it down firmly for a few seconds, making sure there are no air bubbles or wrinkles trapped underneath.
Now, peel the paper from the second side. Use one hand to hold your ear and gently press it back into the position you want. Then, press that exposed adhesive side firmly against the skin on your head. You need to hold it there for about 30 seconds. This allows the medical-grade adhesive to bond properly with the warmth of your skin.
A common mistake is just sticking it on and hoping for the best. The key to a long-lasting hold is applying firm, consistent pressure for at least 30 seconds. This activates the adhesive and ensures a solid bond that can withstand sweat, movement, and a full day of celebrations.
Practice Makes Perfect
Like anything new, a little practice goes a long way. The last thing you want is to be fumbling with the application on the morning of your wedding or right before a big photoshoot.
We always recommend doing a "dress rehearsal" with your EarFix correctors about a week before the event. Put them on in the morning and wear them all day to see how they feel. This trial run accomplishes two critical things:
- Builds Muscle Memory: You'll become a pro at placing and pressing the correctors, which makes the day-of application quick and totally stress-free.
- Confirms Comfort: It gives you a chance to make sure the placement feels good for long-term wear and doesn't cause any irritation.
If you find the adhesive isn't holding as well as you'd like during your practice run, it's almost always a skin prep issue. Make sure you've thoroughly cleaned the area of all oils. For a deep dive into troubleshooting this, check out our guide on what to do when your ear adhesive is not sticking.
Pro Tips For A Truly Invisible Look
Even with a perfect application, a few extra tricks can make your ear correction stickers completely undetectable, even up close or with short hair.
- Mind Your Hairstyle: If you're planning an updo or have short hair, apply the correctors before your hairstylist starts working. This prevents hairspray or other styling products from getting on the skin and weakening the adhesive.
- Blend with Makeup: While EarFix is transparent, you can make it disappear even more. Use a small makeup brush to lightly dust a bit of translucent powder over the edges, or stipple a tiny amount of foundation over it to make it melt right into your skin tone.
- Angle It Right: Try not to place the corrector perfectly horizontal. A slight angle that follows the natural curve of your ear often looks more natural and can even feel more secure.
By mastering these simple techniques, you can ensure your secret weapon for confidence stays exactly that—a secret.
Styling Hair And Makeup With Ear Stickers
Once your ear stickers are set, it's time for the fun part: bringing your whole look together for the wedding or photoshoot. Integrating them with your hair and makeup is surprisingly simple. It really just comes down to a quick chat with your stylists to make sure everything is flawless and your correctors stay perfectly hidden.
This is where you get to embrace any hairstyle you’ve ever dreamed of, without giving your ears a second thought. The freedom to tuck your hair back or sweep it into a gorgeous updo is a total game-changer for so many people. With a reliable prominent ears solution like EarFix, your hairstyle is no longer about concealment. It’s purely about the style that makes you feel amazing.
Working With Your Hairstylist
A little communication goes a long way on a big day. Before your hairstylist even touches your hair, just give them a heads-up that you're wearing ear correctors. It’s a simple mention that prevents them from accidentally spraying product directly on the adhesive or catching a sticker with a brush.
Honestly, most professionals have seen it all and will appreciate you telling them. They'll just work more carefully around that area. That quick conversation is all it takes to ensure your ear correction stickers remain your little secret.
Here are a few hairstyle ideas that look absolutely stunning:
- Elegant Updos: Go for that classic chignon, a romantic braided crown, or a sleek high ponytail. Your profile will look incredible in photos, with no distractions.
- Flowing Waves: Feel free to tuck one side of your hair behind your ear. It creates that effortlessly chic, asymmetrical look that’s so popular for brides and in editorials.
- Half-Up, Half-Down: This style is perfect for framing the face, and with EarFix in place, you won't have to worry about your ears showing from any angle.
The application process itself is straightforward. This visual guide breaks down the essential steps.
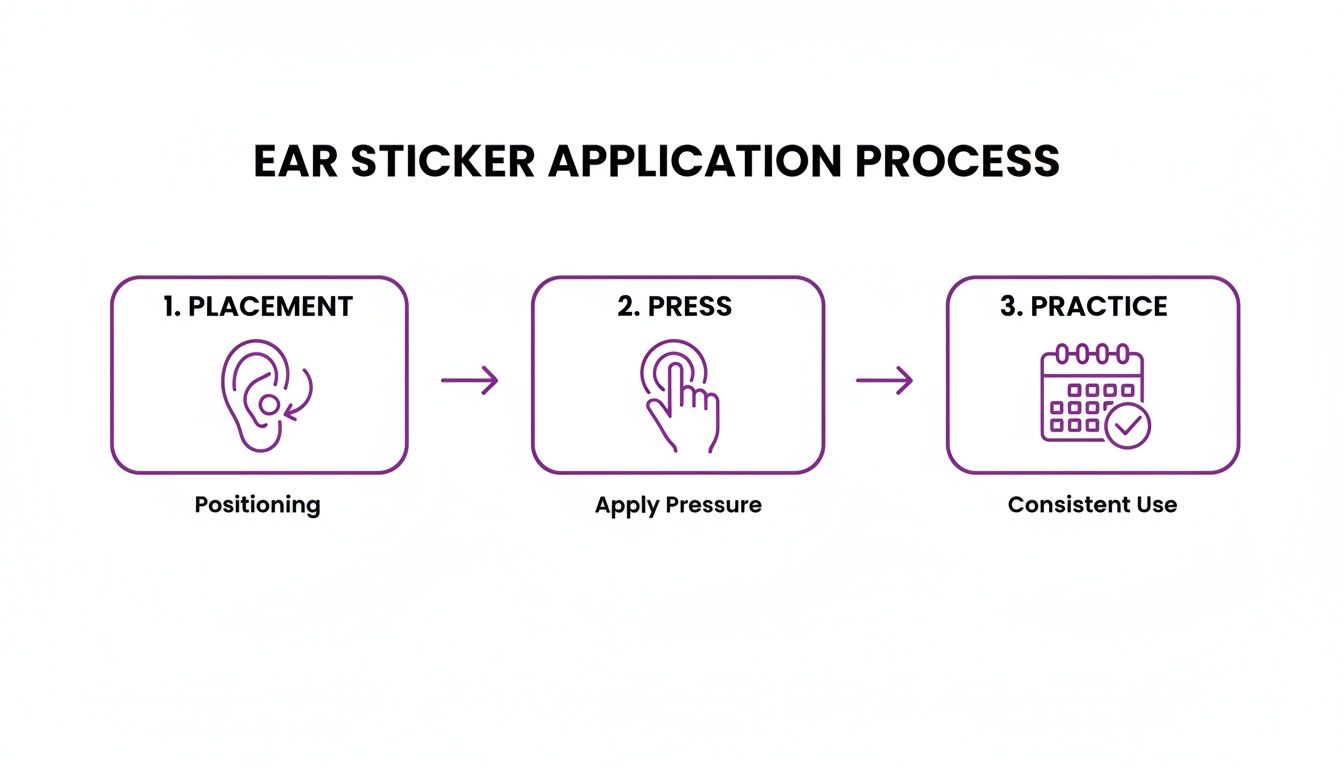
As you can see, success really comes down to proper placement, applying firm pressure, and maybe doing a quick practice run before the main event.
Makeup Tips For A Flawless Finish
Just like with hair, a bit of makeup artist magic will make your ear stickers completely disappear. EarFix correctors are already transparent with a matte finish, which is a huge help because they won't reflect a camera flash.
But for those ultra-high-resolution photos or videos, a few extra touches can give you total peace of mind.
The key is to blend, not to cover. You don't need to cake on makeup over the sticker. Instead, use a light touch to feather foundation or concealer around the edges, making any transition between the sticker and your skin disappear.
Here’s a quick makeup artist-approved routine:
- Apply Foundation Lightly: After applying foundation to your face and neck, take a damp beauty sponge or a small brush and lightly stipple a tiny bit of product over the sticker.
- Set with Powder: A light dusting of fine, translucent setting powder over the area will kill any remaining shine and lock your makeup in place.
- Lock It In with Setting Spray: Finish with a light mist of a long-lasting setting spray. Just make sure it’s a formula that won't mess with adhesives—most professional-grade sprays are totally fine.
This easy approach is a world away from the recovery time and risks that come with surgery. You can see a full breakdown of how the options compare in our in-depth guide, EarFix vs Surgery.
With these simple styling tips, your ear stickers will stay completely invisible. That leaves you free to focus on what really matters: soaking in every single moment of your special day. For more visual guides, check out our How to Use EarFix page or read some inspiring Customer Stories to see the amazing results for yourself.
Keeping Your Look Flawless All Day Long
A wedding or a big photoshoot isn’t a quick affair—it’s a marathon of smiles, hugs, and maybe even a few happy tears. You need a solution that can keep up from the first photo to the last dance. This is where the quality of your ear stickers for weddings or photoshoots really counts, ensuring you feel totally secure and confident the entire time.
The good news is that EarFix correctors are built for real life. They’re made with a water-resistant, medical-grade adhesive that can handle humidity, a bit of sweat on the dance floor, and the general whirlwind of a big event. With the right skin prep, you can trust your correctors to stay put, letting you focus on making memories instead of worrying about your look.
What To Do If An Edge Lifts
Even with a perfect application, little things can happen. Don't panic! A lifting edge is an incredibly easy fix if you know what to do. The trick is to handle it quickly and discreetly.
If you feel an edge starting to come loose, find a private moment in the restroom or a quiet corner. Use the pad of a clean, dry finger—never your nail—to gently press the lifted section back against your skin. Hold it there with firm pressure for about 30 to 60 seconds. The warmth from your finger helps reactivate the adhesive's bond. Just be sure not to slide or rub it, as that can make things worse.
The most common reason for a lift is a bit of lingering moisture or natural skin oil. A quick, gentle blot with a tissue before you press it back down can make all the difference and save the day.
Your Day-Of Emergency Kit
Being prepared is the best way to eliminate stress. I always recommend putting together a tiny touch-up kit to tuck into a purse or give to a trusted friend or bridesmaid. It’s not complicated, but having these few items on hand brings complete peace of mind.
Here’s what you should pack:
- A Spare Pair of EarFix Correctors: Always have a backup. It's far better to have them and not need them than the other way around.
- Alcohol Wipes: These are perfect for quickly cleansing and drying a small area if you need to do a full replacement.
- A Small Compact Mirror: You’ll want this to check your application and make sure everything still looks perfect.
- Cotton Pads or Tissues: Great for blotting away any sweat or oil before a quick re-press or a fresh application.
This little kit ensures you're ready for whatever the day throws your way. For more tips on getting a solid hold in different conditions, take a look at our guide on waterproof ear tape for photos or events.
Comfortable Wear and Gentle Removal
On your special day, comfort is absolutely non-negotiable. EarFix correctors are so lightweight and flexible that you should barely even notice you're wearing them. And when the celebration is over, taking them off is just as simple and pain-free.
To remove them, just gently peel the sticker away from your skin. If you have particularly sensitive skin or the adhesive feels extra-strong, you can apply a small amount of baby oil or a gentle lotion around the edges. This helps dissolve the bond and allows the corrector to slide right off without any pulling or irritation.
This focus on reliable, all-day wear is getting noticed. A recent WeddingWire survey found that 61% of couples now prioritize 'ear alignment' for their photos, with many seeking out non-invasive solutions. EarFix Adult patches are a popular choice, with user testimonials reporting an impressive 92% retention during 12-hour photoshoots. You can find more insights on these trends from the full wedding industry report.
Embrace The Confidence To Shine
Ultimately, getting ready for a wedding or a big photoshoot is about so much more than just ticking boxes on a to-do list. It's about stepping into a moment where you feel completely, unapologetically yourself. While we've walked through all the practical steps, the real "why" behind using a prominent ears solution like EarFix is the incredible sense of confidence it can give you. It’s about taking away one small distraction so your genuine joy can light up every single photograph.
This simple tool empowers you to be fully present in the moment. Instead of subtly worrying about a certain camera angle or how your hair is sitting, you can focus on the laughter, the love, and the memories being made right in front of you. It’s not about changing who you are; it's about feeling so comfortable in your own skin that you forget you were ever worried in the first place.
Your Path to Picture-Perfect Peace of Mind
Think of this as your official permission to let go of that worry and start truly enjoying the planning process. Whether you’re perfecting that dream bridal updo or trying to coordinate a fun family photoshoot, ear correction stickers offer a reliable, pain-free way to get the exact look you’ve always imagined.
When you compare it to the lengthy process and potential risks of surgery, this is an immediate, affordable, and completely safe alternative. You get the aesthetic benefit you want without any of the downtime, making it a perfect fit for life’s most photographed moments. The best part? You can check out our full range of products at earfixusa.com or find them right on Amazon for extra convenience.
With our 30-day money-back guarantee, giving EarFix a try is completely risk-free. We want you to feel as confident in our product as it will help you feel on your special day.
We believe everyone deserves to feel their absolute best during those once-in-a-lifetime events. To see the amazing impact for yourself, we invite you to read some of our inspiring Customer Stories and discover how such a small change can make a world of difference.
Your Questions Answered
Even with the most meticulous planning, it’s completely normal to have a few last-minute questions pop up before a big day. Consider this your go-to guide for those final details, designed to leave you feeling confident and totally prepared for your wedding or photoshoot. Let’s clear up some of the most common queries we hear.
How Far In Advance Should I Try Ear Stickers Before My Wedding?
We always recommend doing a full trial run at least one to two weeks before the event. This isn't just a quick practice session. You want to experience a full day of wear.
A proper trial run lets you nail down the perfect placement for the most natural look, make sure they feel comfortable all day long, and confirm your skin is happy with the gentle, dermatologist-tested adhesive. Getting a successful practice run under your belt gets rid of any day-of jitters and makes the real application a quick, stress-free breeze. For a deeper dive, our How to Use EarFix guide is a fantastic resource.
Are Ear Stickers Visible In High-Resolution Photos Or Videos?
This is a huge concern for anyone in front of a camera, and the answer is a firm "no"—as long as they're applied correctly, they are designed to be virtually invisible. EarFix correctors are crafted from a transparent, medical-grade silicone that has a matte finish. This is key, because a matte surface doesn’t reflect camera flashes.
The secret to making them disappear, especially for high-res photography, is all in the skin prep. When you apply them to clean, dry skin, they blend right in. For that extra layer of confidence, you can ask your makeup artist to lightly stipple a tiny bit of foundation over the area, and it will vanish completely. It's a brilliant non-surgical otoplasty alternative for picture-perfect results. You can see a full breakdown in our EarFix vs Surgery comparison.
The secret to invisibility is the matte, transparent material. Unlike shiny tapes, EarFix absorbs light rather than reflecting it, making it undetectable to even the sharpest lenses.
Can I Use The Baby Version For My Infant's First Photoshoot?
Absolutely! The baby ear corrector was created specifically with an infant's delicate and sensitive skin in mind.
The materials are hypoallergenic, latex-free, and have been rigorously dermatologist-tested for safety. The gentle adhesive provides more than enough hold to get you through a photoshoot without causing any irritation. It’s a wonderfully safe and pain-free way to get that picture-perfect look for your little one’s big debut. Always follow the instructions carefully and monitor your baby's skin, just as you would with any new product. You can see how much other parents have loved them in our Customer Stories.
Ready to feel completely confident on your special day? Explore the full range of adult and baby ear correction solutions from EarFix USA and enjoy a flawless, worry-free look.