
Why Your Ears Shouldn't Ruin Your Best Photos
You spent months planning the wedding. You booked the photographer, chose the venue, picked out an outfit that makes you feel incredible. Then you see the photos and all you can focus on is how your ears look in that profile shot.
If this sounds familiar, you are far from alone. According to the American Society of Plastic Surgeons, over 25,000 otoplasty procedures are performed in the U.S. each year, many of them motivated by frustration over how ears appear in photos. But surgery is a serious commitment (think $5,000 to $10,000, plus 6 to 8 weeks of recovery) that most people do not need, especially when the concern is really about looking great for a specific event or photo session.
This guide covers everything you can do to feel confident about your ears at weddings, professional photoshoots, school portraits, and everyday snapshots. From photography angles to hairstyling to temporary adhesive correctors, these are practical, tested strategies you can use right away.
Photography Angles That Minimize Ear Prominence
Before you change anything about your appearance, consider changing the camera angle. Professional photographers use these techniques every day to flatter their subjects.
The Three-Quarter Turn
Instead of facing the camera straight on, rotate your body about 30 to 45 degrees. This naturally places one ear further from the lens, reducing its visual weight in the frame. In group photos, angle your body slightly inward toward the center of the group for the same effect.
Camera Height Matters
A camera positioned at or slightly above eye level creates the most universally flattering perspective. It elongates the neck and defines the jawline, drawing attention toward the center of the face rather than the sides. Ask your photographer to avoid shooting from below chin level, which exaggerates ear prominence and distorts facial proportions.
Specific Tips by Photo Type
- Selfies: Hold your phone slightly above your eyeline and angle it down. Tilt your chin down about 10 degrees.
- Group shots: If you are taller, bend your knees slightly to align with others. Stand toward the middle of the group rather than the edge.
- Seated portraits: Lean forward slightly from the hips. This creates a more dynamic line and shifts proportions in your favor.
- Professional headshots: Ask the photographer to use a longer focal length (85mm or above). Wider lenses distort features at the edges of the frame, which is exactly where your ears sit.
Hairstyles That Complement Your Features
Your hairstyle is one of the most powerful tools for controlling how your ears appear on camera. The key is choosing styles that work with your features rather than obviously hiding them.
For Longer Hair
- Soft face-framing layers: Layers that fall around the jawline create natural coverage without looking like a disguise.
- Deep side part: Lets hair cascade over one side, creating asymmetry that draws the eye to your face.
- Loose waves or curls: Volume around the ears softens the ear line while adding texture.
- Half-up, half-down: Frames the face while keeping hair around the ears.
For Shorter Hair
- Textured bob: A bob landing just below the ears with added volume on the sides creates balance.
- Pixie with longer sideburns: Piecey sideburns provide subtle coverage while keeping the style modern.
- Added texture and movement: Avoid slicked-back styles that pull hair away from the ears. Opt for styles with natural body.
For more detailed styling ideas, check out our guide to hairstyles for prominent ears.
Accessories That Redirect Attention
- Drop earrings over studs: Elongated earrings create a vertical line that draws the eye downward. Large, bulky studs can make ears appear wider.
- Wide headbands or silk scarves: Cover the tops of the ears while looking intentional and stylish.
- Statement necklaces: Pull the viewer's gaze toward the neckline and away from the ears.
- Glasses with bold frames: The right frames balance facial proportions and create a strong visual anchor at the center of the face.
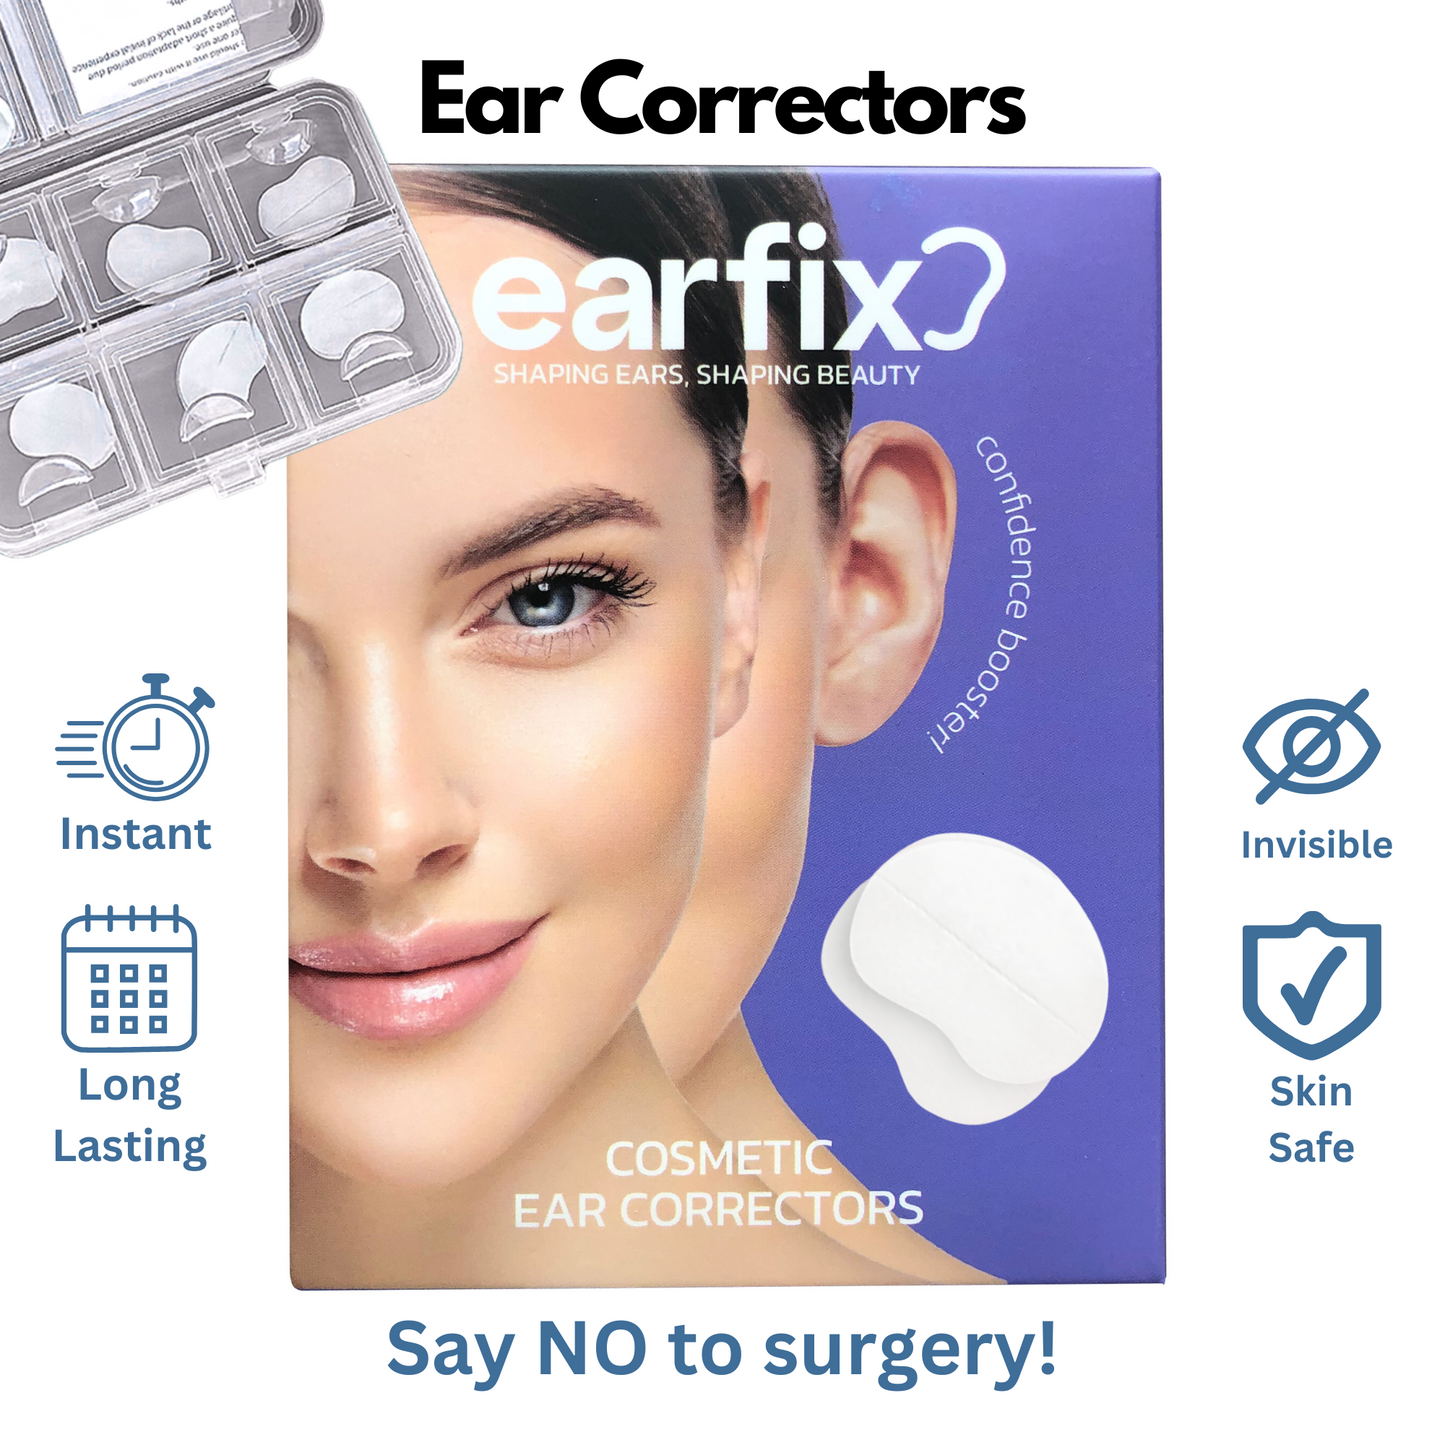
Temporary Ear Correction Options Compared
When angles and styling are not enough, temporary ear correction products offer a direct, physical solution. Here is an honest comparison of what is available.
| Method | Visibility on Camera | Hold Time | Comfort | Best For |
|---|---|---|---|---|
| Medical-grade adhesive correctors | Nearly invisible (transparent, matte finish) | 24 to 48 hours | High (flexible silicone, hypoallergenic) | Weddings, headshots, all-day events |
| Medical tape | Noticeable sheen and texture under lighting | 1 to 4 hours | Low (stiff, can irritate, leaves residue) | Quick last-minute fixes where visibility is less critical |
| Strategic hairstyling | Natural, but movement can reveal ears | Varies with activity | High (non-invasive) | Casual photos, styles that naturally cover ears |
| Contouring with makeup | Subtle, but can smudge under hot lights | A few hours before needing touch-ups | High | Minor adjustments, reducing shadow behind ears |
| Digital retouching | Invisible in final images only | Permanent in the edited file | N/A | Still photos (not video or live events) |
Medical tape is the cheapest option, but it was never designed for cosmetic use. Under studio lighting or camera flash, its sheen becomes obvious. It also loses grip quickly as skin produces natural oils, making it unreliable for events lasting more than a couple of hours.
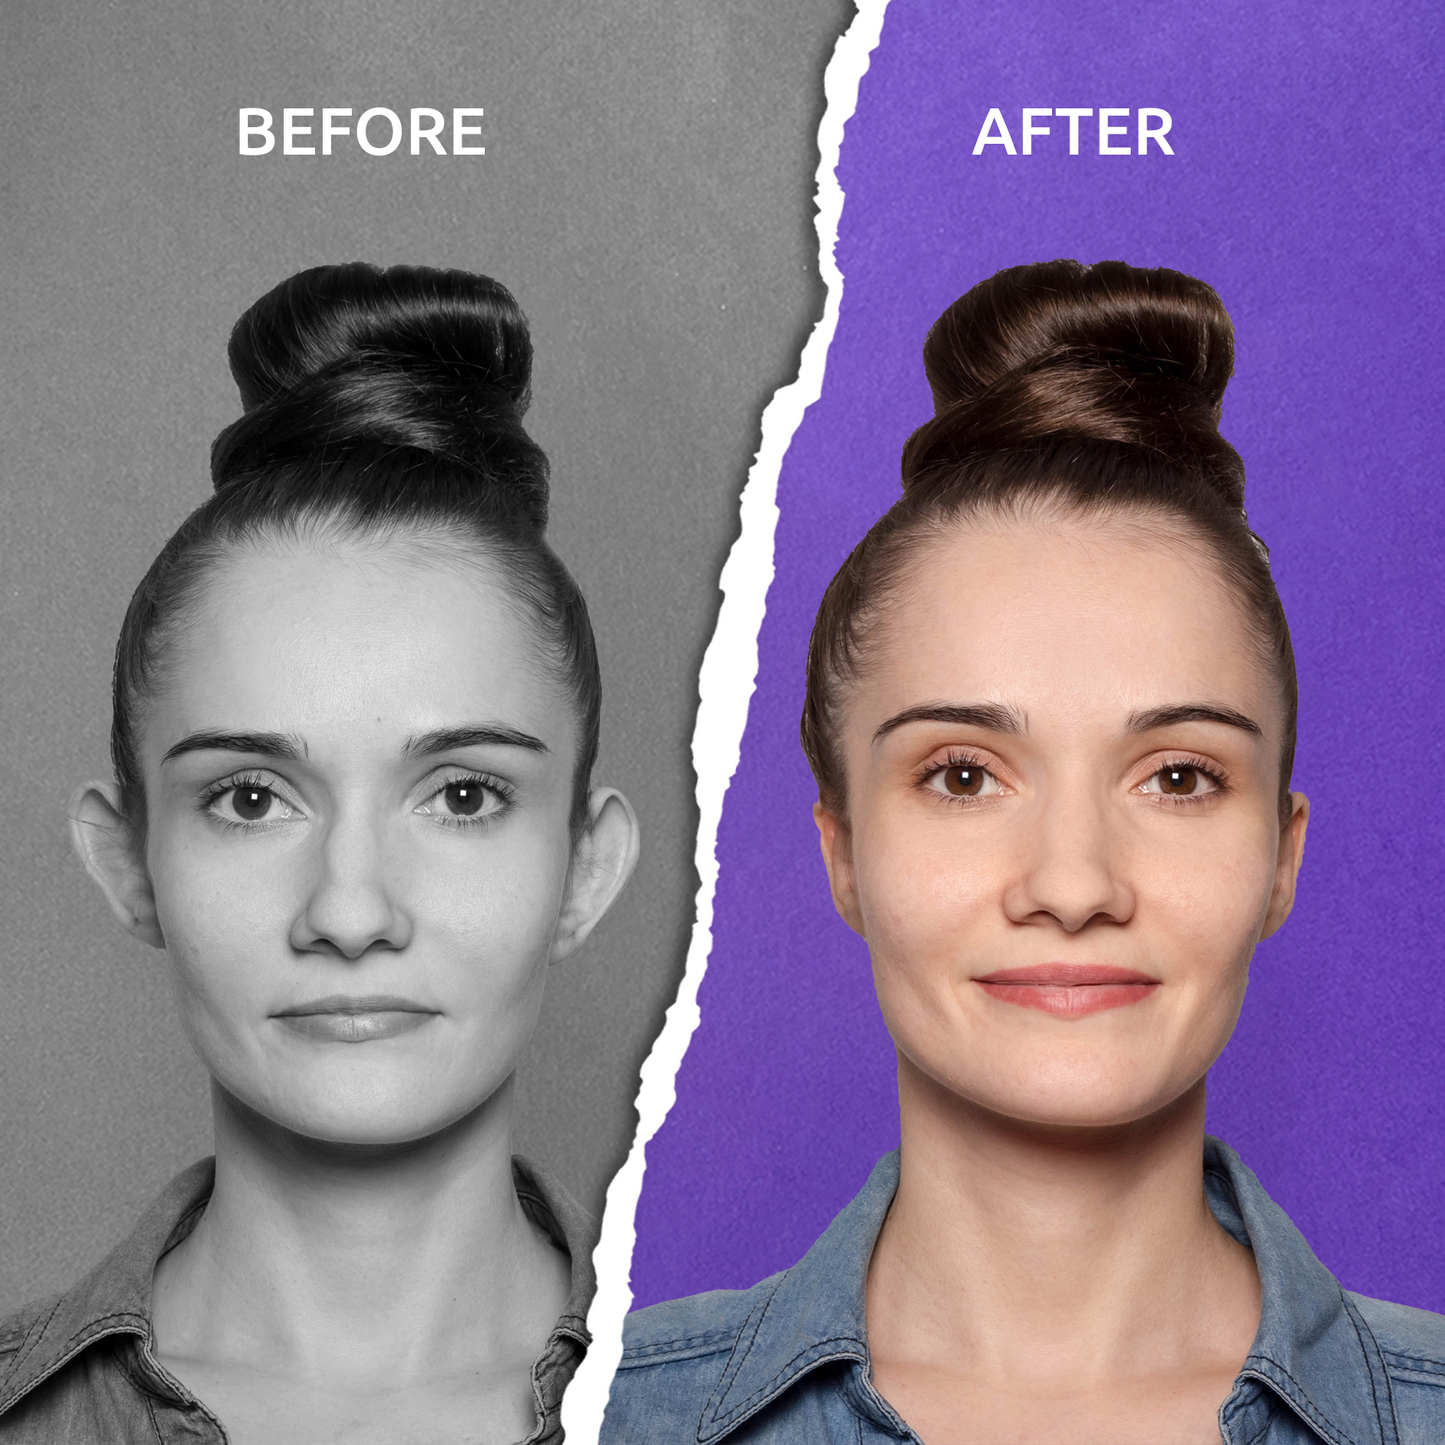
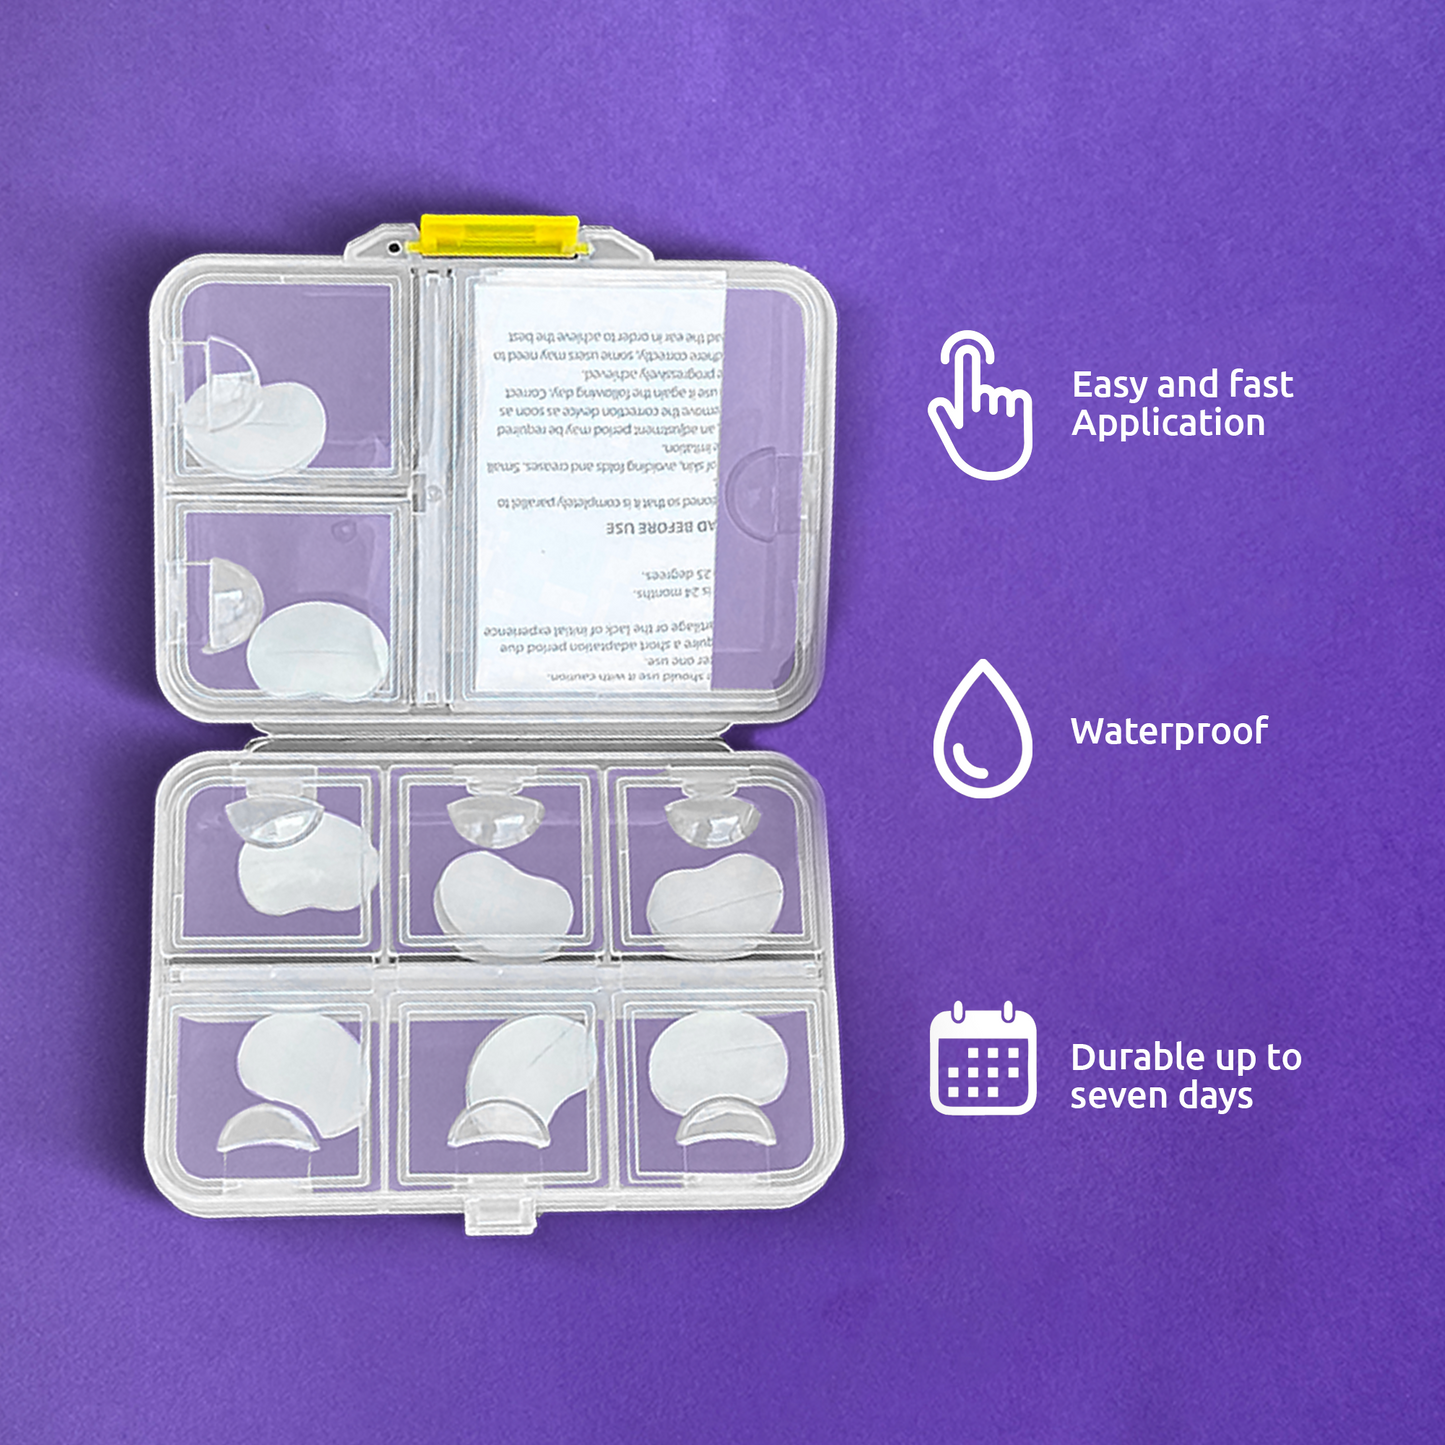
Purpose-built adhesive correctors like EarFix are made from transparent, medical-grade silicone with a matte finish that does not reflect light. They are dermatologist-tested, hypoallergenic, and designed to hold through sweat and humidity for up to 48 hours.
Contouring and Makeup Techniques for Ears
Makeup artists use a few specific techniques to reduce the visual prominence of ears in photos. These work especially well under controlled lighting conditions like studio shoots.
- Shadow reduction: Apply a light concealer or highlighter to the area directly behind the ear where it meets the head. This reduces the shadow gap that makes ears look more prominent in photos.
- Ear contouring: Use a matte bronzer or contour shade on the front surface of the ear (the parts that catch light and stand out). This makes the ear recede visually.
- Setting is critical: Dust translucent setting powder over any product applied near the ears, then finish with setting spray. Ears produce oil, and unset makeup will transfer or break down within an hour.
If you are combining makeup with adhesive correctors, always apply the correctors first to clean, dry skin. Then blend foundation or concealer over the edges with a damp beauty sponge for a seamless transition.
Ear Correction for Weddings: A Complete Walkthrough

Weddings present unique challenges. The day is long (often 10 to 14 hours from hair and makeup to the last dance), emotions run high, and you will be photographed from every conceivable angle. Here is how to handle each stage.
For the Bride
Updos, veils, and tiaras all draw attention to the profile. If you are wearing your hair up, ear visibility is practically guaranteed. This is exactly the scenario where adhesive correctors earn their value. Apply them as the very first step, before your hair and makeup team arrives. Communicate with your hairstylist that you have correctors on so they can work carefully around the area.
For the Groom and Wedding Party
Shorter hairstyles mean less natural coverage. A three-quarter pose during formal portraits makes a significant difference. If you want a physical correction, adhesive correctors work just as well under short hair since they sit behind the ear, completely hidden from the front.
For Kids in the Wedding Party
Flower girls and ring bearers are photographed extensively. For children with prominent ears, the same adhesive correctors work well, provided they use hypoallergenic, dermatologist-tested materials safe for young skin. For infants, look for versions with an even gentler adhesive designed specifically for delicate baby skin.
Waterproof Options for Outdoor Events
Beach weddings, summer graduations, outdoor festivals, and destination events all introduce moisture as a factor. Regular adhesives fail when exposed to sweat, humidity, or water. Here is what actually works in these conditions.
- Medical-grade waterproof adhesive correctors: Products like EarFix use a waterproof adhesive that repels moisture rather than absorbing it. Users have reported them holding through destination weddings in humid tropical climates, including exposure to ocean breezes.
- Avoid generic medical tape outdoors: Standard medical tape absorbs moisture, which destroys its grip. In humid conditions, it may last less than an hour.
- Prep matters even more in heat: When temperatures are high, your skin produces more oil. Be extra thorough with the alcohol wipe step before application.
Your Event Prep Timeline
Whether your event is a wedding, a professional headshot session, or a family portrait, this timeline ensures you are fully prepared.
One Week Before
- Do a full trial run. Apply your correctors in the morning and wear them all day. This builds confidence in the product and helps you find the ideal placement for your specific ear shape.
- Test your hairstyle. If possible, do a trial with your hairstylist while wearing the correctors. Confirm that your chosen style works with the correctors in place.
- Practice your angles. Take selfies and photos from multiple angles to identify your most flattering poses.
The Night Before
- Lay out your supplies: correctors, alcohol wipes, a small mirror, and a spare pair.
- Avoid heavy moisturizers or oils on and around your ears before bed.
Day Of: 60 Minutes Before Hair and Makeup
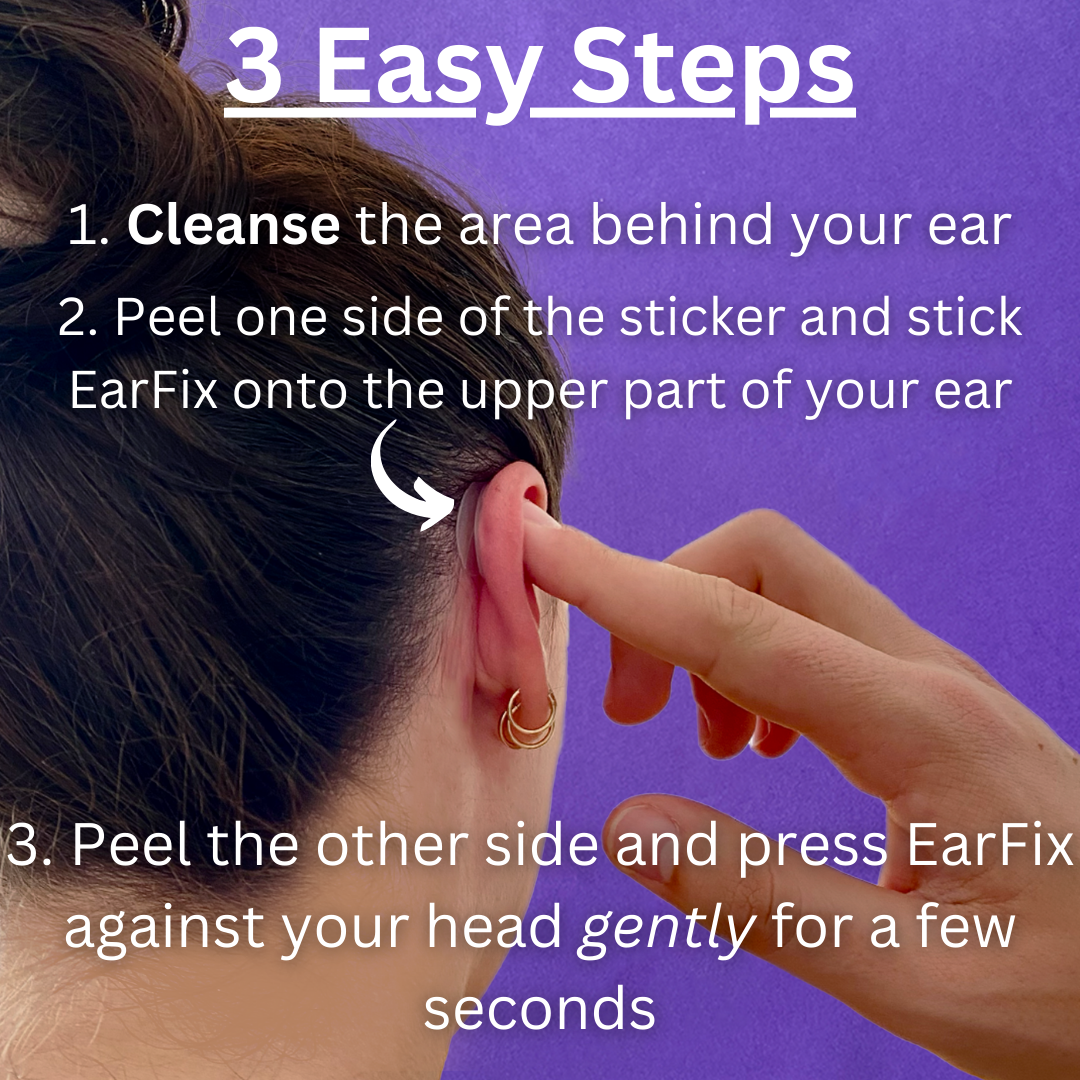
- Clean the skin. Use an alcohol wipe or oil-free cleanser on the back of each ear and the corresponding spot on your head. Let the area air dry completely.
- Apply the corrector. Peel one side of the adhesive backing (do not touch the sticky surface with your fingers). Press it to the upper back of your ear. Peel the second side, gently press your ear into position, and hold firmly for 60 seconds.
- Let the adhesive cure. Wait at least 15 minutes before your hairstylist begins working. This allows the bond to fully set.
- Check your work. Use a handheld mirror to verify placement from multiple angles. The correction should look subtle and natural, not overly flattened.
During the Event
- If an edge lifts, press it back with a clean, dry fingertip and hold for 30 to 60 seconds. The warmth from your finger reactivates the adhesive.
- Avoid rubbing or sliding the corrector. Gentle, firm pressure is the fix.
- If a corrector needs full replacement, wipe the area with an alcohol pad and apply a fresh one. The whole process takes under two minutes.
Pack a Touch-Up Kit
Keep these items in a small bag with a trusted friend or in your event bag:
- One spare pair of correctors
- Two alcohol wipes
- A compact mirror
- A few cotton pads or tissues for blotting
After the Event: Removal
Peel slowly from one edge. If you have sensitive skin, dab baby oil or a gentle oil-based makeup remover around the edges. Let it soak in for a minute to dissolve the adhesive before peeling. No pulling or wincing required.
Frequently Asked Questions
Will adhesive ear correctors show up in professional photos or HD video?
When applied correctly to clean, dry skin, quality adhesive correctors are virtually invisible. The transparent, matte-finish silicone does not reflect camera flash or studio lighting, which is the primary reason shiny medical tape gets spotted. For extra insurance, you can stipple a small amount of foundation over the edges with a damp beauty sponge. Most users report that correctors are undetectable in event photos when properly applied.
How long will ear correctors last during a wedding or long event?
EarFix correctors are designed to hold for 24 to 48 hours with proper skin preparation. For a typical 10 to 14 hour wedding day, this provides a generous margin. The most important factor is applying them to completely clean, oil-free skin. Oily skin types should be especially thorough with the alcohol wipe step.
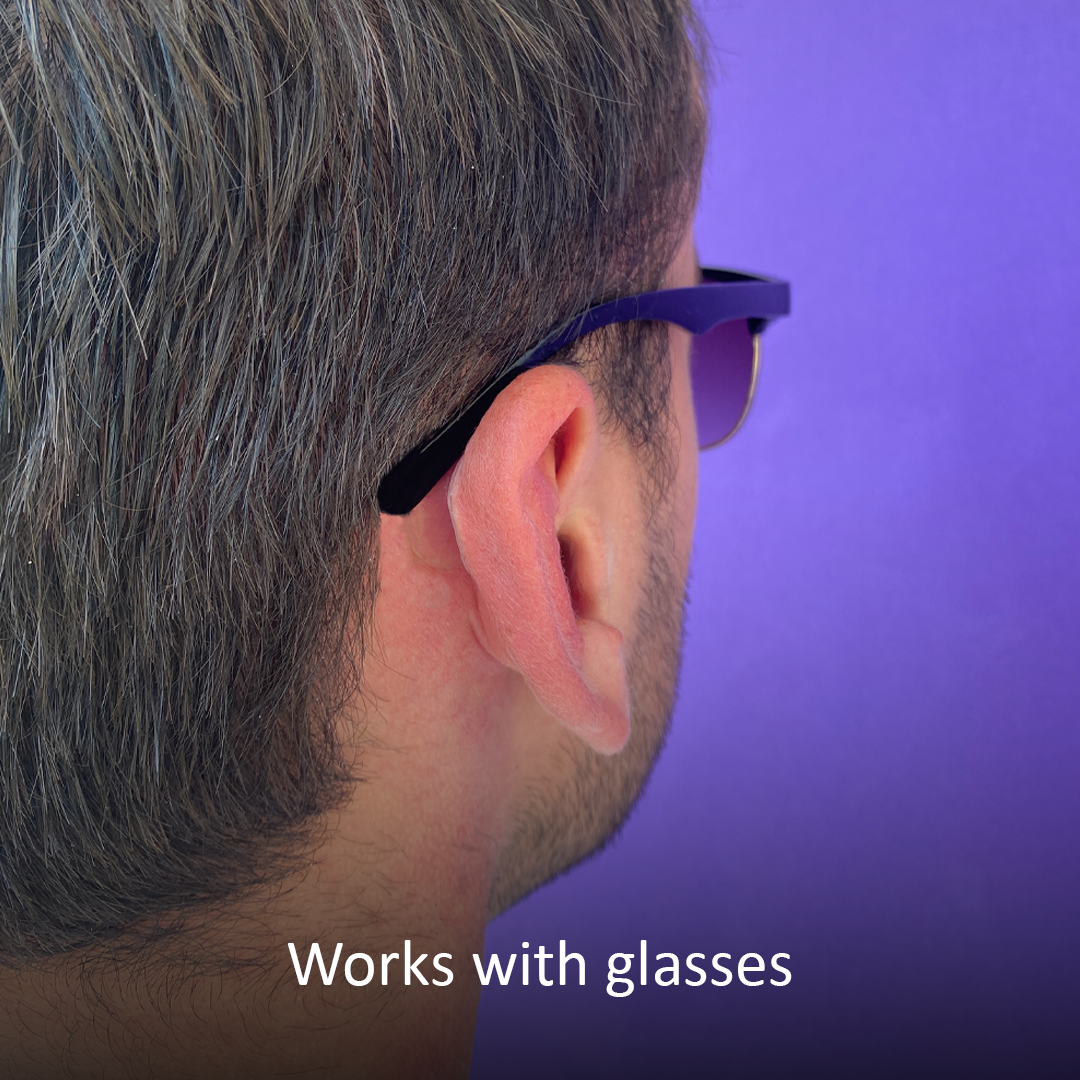
Can I wear an updo or short hairstyle with ear correctors?
Yes. Because the correctors sit on the back of the ear and behind the head, they are hidden from front and side views regardless of hairstyle. Updos, ponytails, pixie cuts, and buzz cuts all work. Do a trial run with your intended hairstyle before the event to confirm you are happy with the look.
What should I do if my corrector starts to lift during an event?
Find a private moment, press the lifted edge back against your skin with a clean, dry finger, and hold firm pressure for 30 to 60 seconds. If the corrector has fully loosened (usually due to oil buildup), remove it, wipe the area with an alcohol pad, and apply a fresh one. This is why packing a spare pair is recommended.
Are adhesive ear correctors safe for children and babies?
For children and teens, standard adult correctors made from hypoallergenic, medical-grade silicone are appropriate. For infants, use correctors specifically designed for baby skin, which feature a gentler adhesive formulation. Dedicated baby correctors are dermatologist-tested, latex-free, and designed for the softness of newborn skin. Always monitor your baby's skin and provide breaks between uses.
Should I apply correctors before or after makeup?
Always before. Foundations, moisturizers, and setting sprays contain oils and silicones that create a barrier between the adhesive and your skin. Apply correctors to clean, bare skin first, let the adhesive set for 15 minutes, then proceed with makeup. You can blend a small amount of foundation over the corrector edges afterward without affecting adhesion.